Why Ribbon Placement Can Transform Your Christmas Tree
You’ve probably noticed that professionally decorated Christmas trees have something yours doesn’t—and it’s likely the ribbon. The way you place ribbon throughout your tree can mean the difference between a flat, cluttered display and a stunning centerpiece that draws every eye in the room. Most people simply wrap it around the outside or drape it randomly, missing the techniques designers use to create depth and visual flow. Here’s what you’re overlooking.
Key Takeaways
- Proper ribbon distribution creates depth and dimension, preventing a flat appearance that occurs when ribbon wraps only horizontally around the tree.
- Balanced placement encourages natural visual flow throughout the tree rather than drawing eyes to concentrated spots with disproportionate material.
- Matching ribbon width to tree scale ensures the accent enhances rather than overwhelms small trees or disappears on large ones.
- Strategic placement transforms ribbon from a confusing mess into a stylish accent that elevates the overall Christmas tree aesthetic.
- Assessing balance from multiple angles during decoration prevents common mistakes and maintains a professional, cohesive appearance.
The Foundation of Visual Flow: How Ribbon Creates Movement Through Your Tree
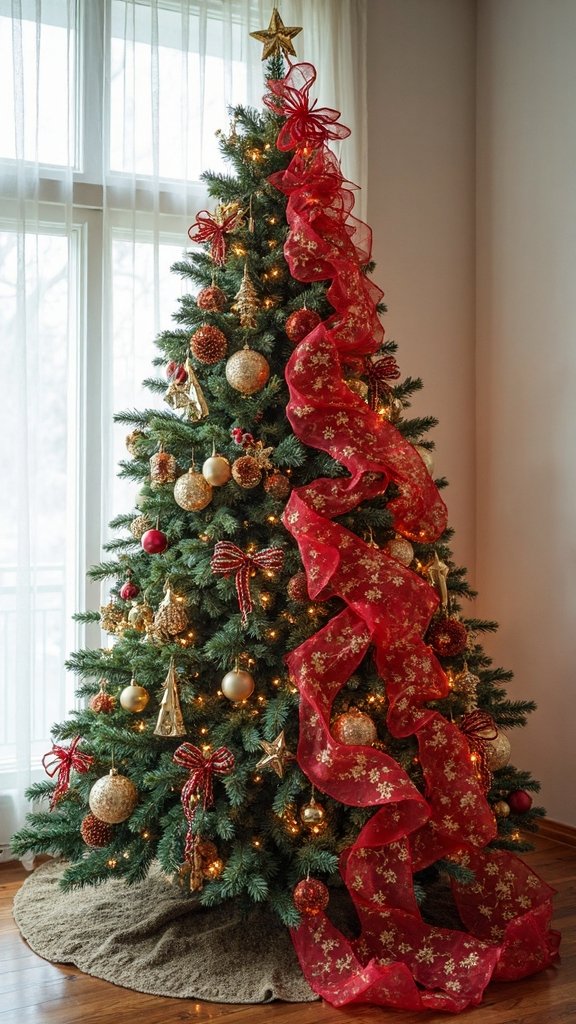
When you drape ribbon through your Christmas tree’s branches, you’re creating diagonal lines that naturally guide the eye from top to bottom in a graceful, cascading pattern. This ribbon flow alters a static decoration into something changeable and engaging. Think of it as building invisible pathways that connect each section of your tree.
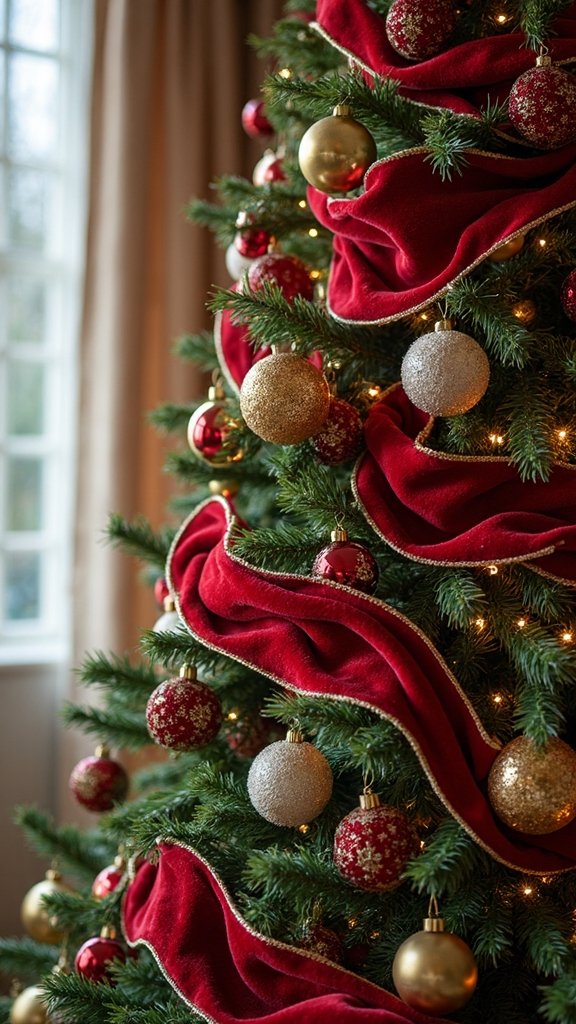
The key lies in establishing visual rhythm—the repeated pattern that makes your tree feel cohesive rather than cluttered. Start at the top and weave your ribbon in loose, swooping curves around the tree’s perimeter. Space each wave about 12-18 inches apart to maintain balance. You’ll notice how this technique draws attention to your favorite ornaments while filling empty spaces. The movement you’ve created gives your tree professional polish and dimensional depth. Outdoor Christmas garland can also add festive charm to your home’s exterior.
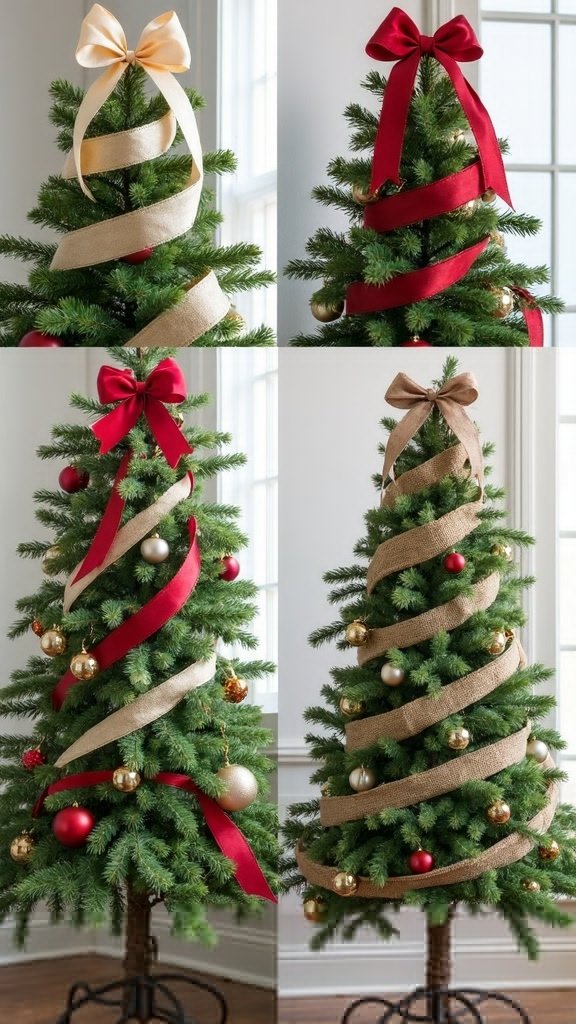
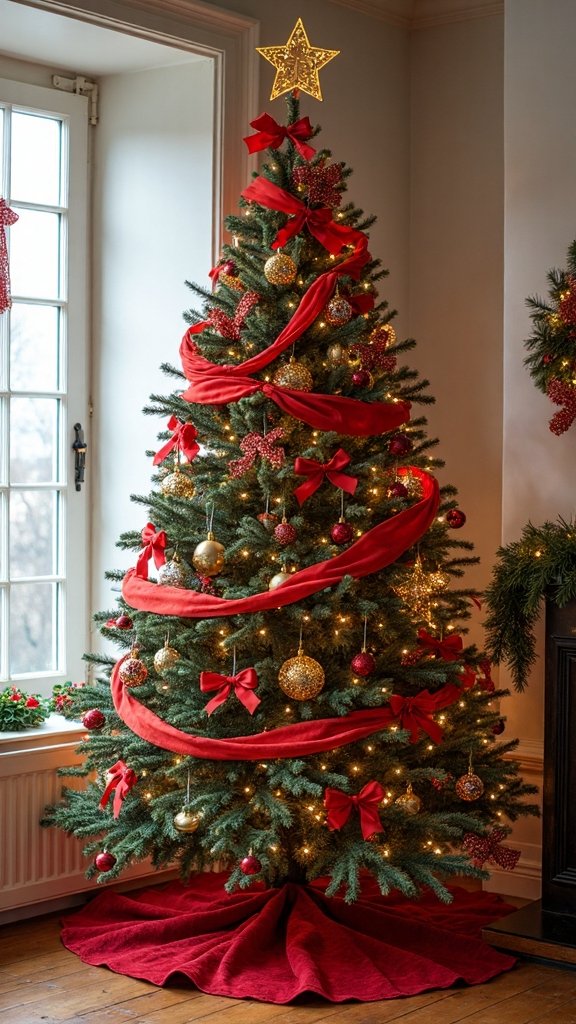
Vertical vs. Horizontal Ribbon Techniques and When to Use Each
While diagonal ribbon placement offers lively movement, vertical and horizontal techniques each serve distinct purposes in your tree decorating strategy. Vertical ribbons create graceful, elongating lines that make your tree appear taller and more sophisticated. You’ll want to use this method when working with formal color schemes or narrow spaces. Simply let your ribbon flow straight down from top to bottom, securing it at several points. Horizontal placement works beautifully for wide, full trees where you’re emphasizing layers and depth. Wrap ribbons around your tree in gentle loops, creating cascading patterns that highlight each branch tier. Consider angled placement as a hybrid approach—it combines both techniques’ benefits while adding energetic interest. Choose your method based on your tree’s proportions and your desired visual impact. Enchanting outdoor Christmas railing decor can also inspire your ribbon placement techniques.
Choosing the Right Ribbon Width and Texture for Your Tree Size
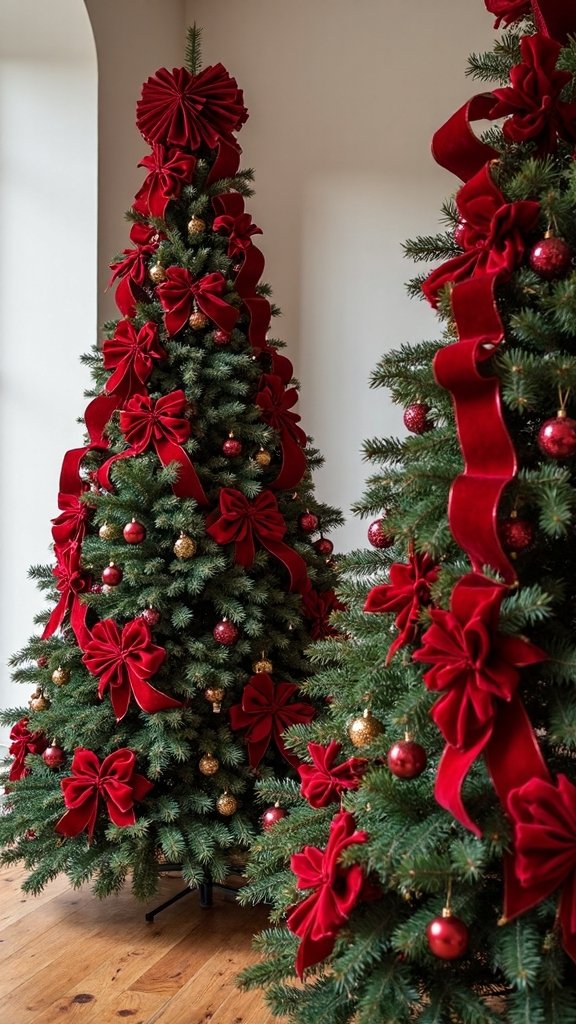
The width of your ribbon directly impacts how your tree’s proportions appear, so you’ll need to match dimensions carefully. For small trees under four feet, use 1.5 to 2.5-inch ribbons to avoid overwhelming the branches. Medium trees between five and seven feet work best with 2.5 to 4-inch widths that create balanced visual interest. Large trees over eight feet can handle 4 to 6-inch ribbons that make bold statements from across the room. Balanced Christmas tree decor can help create symmetry, depth, and professional design flow.
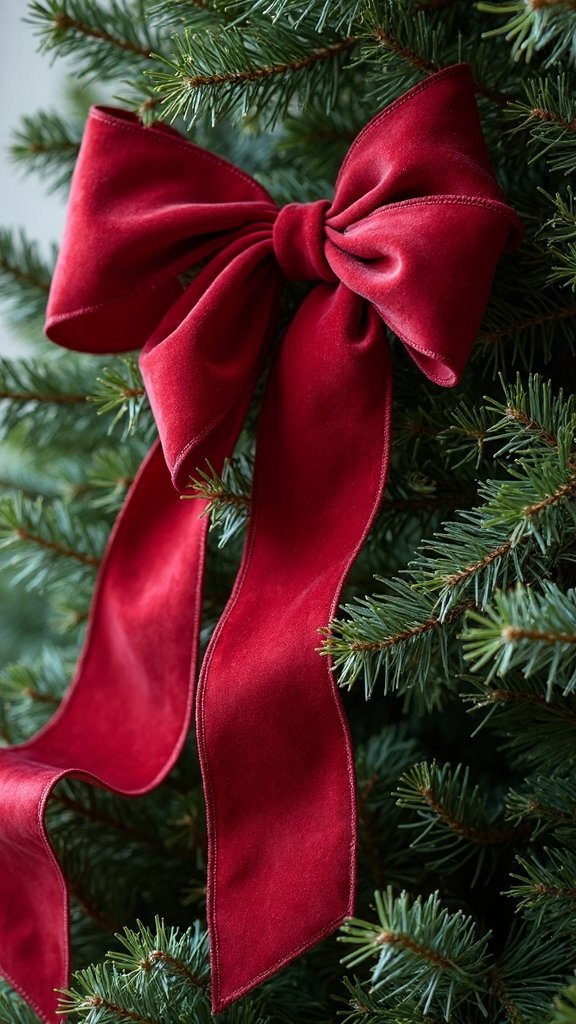
Ribbon width variety allows you to layer different sizes for added depth and dimension. Pair a wider base ribbon with narrower accent ribbons for sophisticated looks. Ribbon texture experimentation enhances your overall design—combine wired edges for structure with softer sheers for delicate contrast. Velvet ribbons add luxury, while burlap creates rustic charm. Test different combinations before committing to guarantee harmonious results.
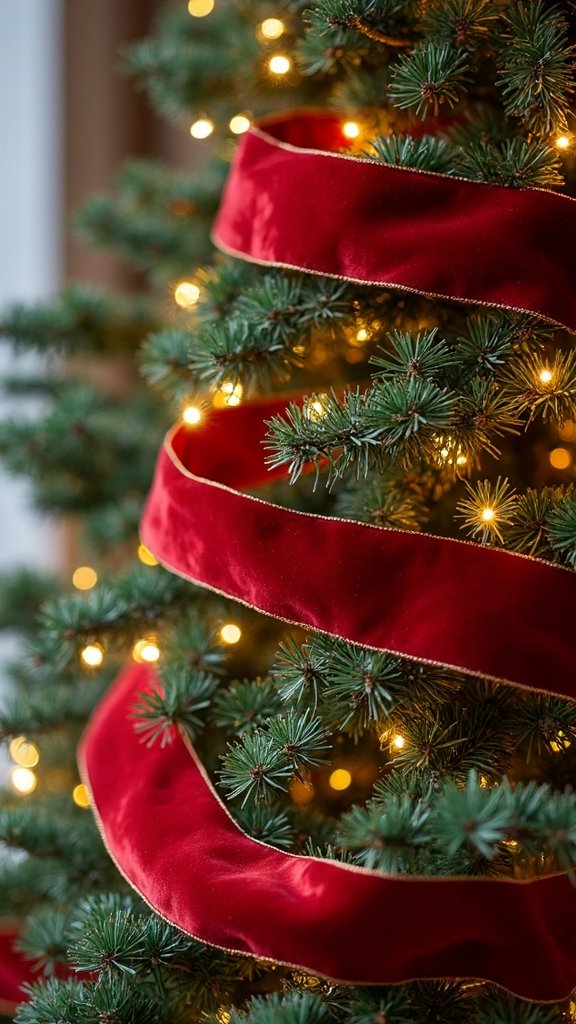
The Professional Method: Tucking Ribbon Deep Into Branches for Dimension
Once you’ve selected your perfect ribbon, the placement technique determines whether your tree looks professionally decorated or simply wrapped. The key difference lies in achieving proper ribbon depth by pushing material several inches into the tree rather than draping it across outer branches.
Start at the top and work downward in vertical sections. Push each ribbon loop 4-6 inches deep into the branches, creating dimensional waves that catch light from multiple angles. This branch positioning creates visual interest and prevents the flat, lifeless appearance of surface-level placement.
Alternate your depths throughout the tree—some ribbons tucked deeply, others positioned midway through branches. This variation imitates professional designers’ techniques and guarantees your ribbon becomes an integral part of the tree’s structure rather than an afterthought. Elegant outdoor Christmas decor can also enhance the overall sophistication of your holiday display.
Using Ribbon to Fill Awkward Gaps and Balance Sparse Areas
Every Christmas tree has those frustrating spots where branches seem thinner or lighting appears uneven, and ribbon becomes your most precious tool for disguising these imperfections. You’ll want to strategically position ribbon vertically through sparse sections, creating the illusion of fuller foliage while accentuating visual interest throughout your tree.
Focus on problem areas by weaving ribbon deeper into gaps, allowing it to cascade forward and create dimension where branches fall short. This technique works exceptionally well for enhancing branch coverage on artificial trees with visible center poles or natural trees with one-sided growth patterns.
You can also loop ribbon horizontally across bare spots, securing it behind adjacent branches to maintain the cascading effect. The ribbon’s texture and sheen naturally draw eyes away from imperfections while establishing balanced visual weight across your entire tree. Rustic outdoor wooden Christmas tree decor can also be used to add natural beauty and texture to your tree.
Color Coordination: Making Ribbon the Bridge Between Ornaments and Lights
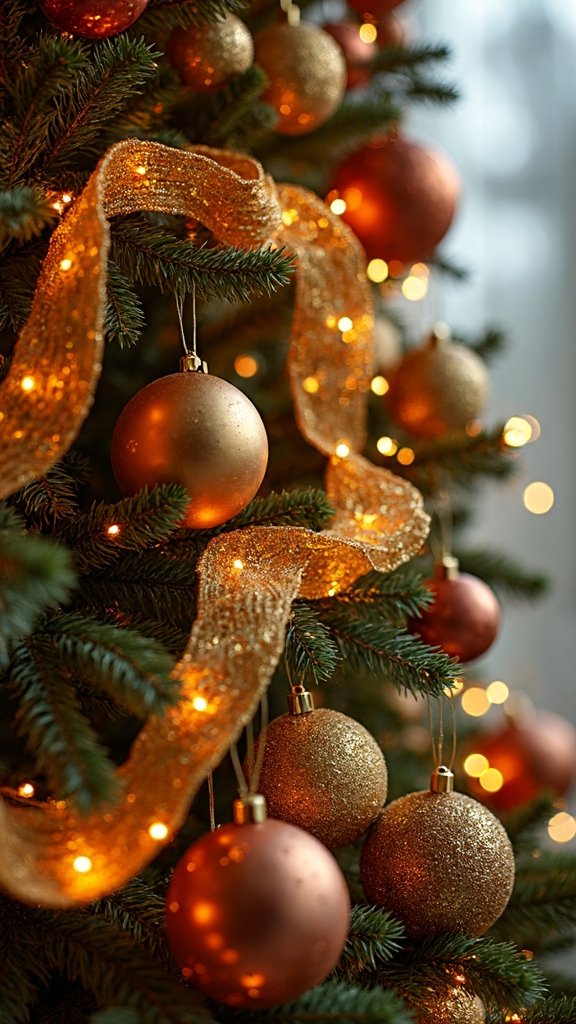
When ribbon effectively coordinates with your ornament colors and light tones, it remodels disconnected decorations into a cohesive design magnum opus. Select ribbons that echo your dominant ornament shades while introducing complementary hues that tie everything together seamlessly. If you’ve chosen gold ornaments and warm white lights, incorporate cream or champagne ribbons to establish ribbon color harmony throughout your tree’s vertical space.
Use ribbon as visual accent by selecting patterns that reflect both your lighting temperature and ornament finishes. Metallic ribbons amplify the sparkle from your lights, while matte textures provide essential contrast against glossy ornaments. Chic outdoor Christmas decor can also inspire ribbon placement to achieve a modern, elegant look.
You’ll achieve professional-looking results by choosing two or three ribbon colors maximum, ensuring each selection references either your ornament palette or lighting choice. This strategic approach creates visual flow that guides viewers’ eyes naturally around your entire tree.
Layering Multiple Ribbon Types for a High-End Designer Effect
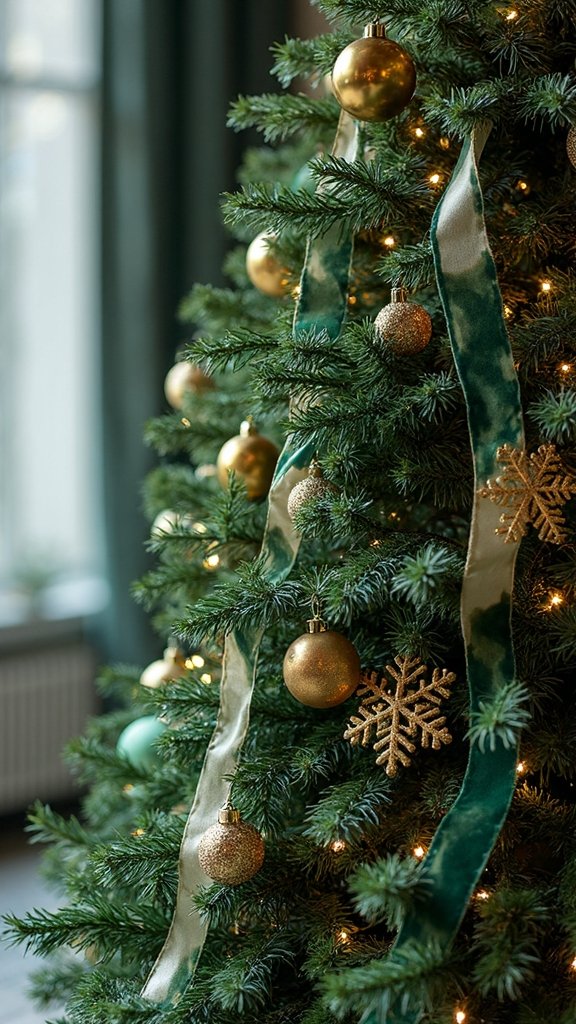
Taking your color-coordinated ribbon foundation to the next level involves strategically combining different ribbon textures, widths, and patterns to create dimensional interest. Start with a wide wired ribbon (4-6 inches) as your base layer, placing it deepest into the tree. Next, add a complementary medium-width ribbon (2.5-3 inches) with contrasting texture—pair velvet with satin or burlap with metallic. Finally, weave in a narrow accent ribbon (1-1.5 inches) featuring patterns like stripes or glitter. These ribbon layering techniques work best when you maintain consistent spacing between each type. You’ll achieve unique ribbon combinations by limiting yourself to three ribbon varieties maximum, ensuring each layer remains visible from multiple angles and creates depth without overwhelming your ornaments. Crafting Boho Christmas Ornaments With Macramé and Beads can also be a great way to add unique elements to your Christmas tree.
Common Ribbon Placement Mistakes That Make Trees Look Cluttered or Flat
Even experienced decorators fall into predictable traps that undermine their ribbon’s visual impact, converting what should be a stylish accent into a confusing mess. Disproportionate ribbon placement occurs when you concentrate too much material in one area while leaving other sections bare. This creates awkward visual weight that draws eyes to specific spots rather than encouraging natural flow throughout your tree. Poor ribbon distribution also happens when you wrap ribbon horizontally around your tree like stripes, making it look flat and two-dimensional instead of creating depth. You’ll also encounter problems when using ribbon widths that don’t match your tree’s scale—oversized ribbon overwhelms small trees while narrow ribbon disappears on large ones. Avoid these mistakes by stepping back frequently during placement to assess balance and dimension from multiple angles.
Frequently Asked Questions
How Much Ribbon Do I Need for My Tree Size?
You’ll need 9-12 feet of ribbon per foot of tree height for a full look. Calculate ribbon quantity based on tree height and width—wider trees require more. For a 6-foot tree, plan on 54-72 feet of ribbon total.
When Should I Add Ribbon During the Decorating Process?
You’ll achieve ideal ribbon arrangement by adding it right after placing your lights but before hanging ornaments. This ribbon placement order guarantees you’re creating proper depth and layers without disturbing delicate decorations already on your tree.
Can I Reuse Ribbon From Previous Years Effectively?
You can absolutely reuse ribbon from previous years! Start by examining ribbon condition carefully—check for fraying edges, faded colors, or crushed sections. If it’s still lively and structurally sound, you’ll save money while maintaining beautiful results.
What Are the Best Ribbon Materials for Outdoor Christmas Trees?
You’ll want weather resistant fabrics like polyester or nylon for outdoor trees. These durable ribbon designs withstand rain, snow, and wind better than natural materials. They won’t fade, fray, or deteriorate throughout the season’s harsh conditions.
How Do I Store Ribbon to Prevent Wrinkles and Damage?
You’ll prevent wrinkles by using proper ribbon storage techniques like rolling ribbons loosely around cardboard tubes. Store them in choosing the right ribbon storage containers—plastic bins with dividers work best. Keep containers in cool, dry spaces away from direct sunlight.
Conclusion
You’ve now got the essential techniques to metamorphose your Christmas tree with strategic ribbon placement. Remember to step back frequently and view your work from different angles, checking for balance and visual flow. Don’t rush the process—taking time to tuck ribbon deep into branches and adjust placement will create that professional, dimensional look you’re after. Your tree will become a stunning focal point.